Tournr Tips #6 – Adding a Tournament to a Group

One of the biggest changes to Tournr since launch was the addition of Groups, I wrote about that a little while ago, but due to not wanting to write one massive post, I eschewed explaining every bit of it, and so I’m going to start to rectify that with the next few tips explaining how to do groupy / tournamenty stuff!

So you have your group and you want to add an existing tournament to it.

First go to your groups page, you can do this from the homepage:
image

or from the ‘My Groups’ page:
image

Scroll to the bottom of your groups page and expand the ‘Add a tournament to the group’ panel:

image

Then press the ‘Add my tournament’ button

image

You will then be presented with a form with 2 fields to fill in (you only need to fill in the Tournament ID / URL though:

image

In this case I’ve put in the whole URL (from the top of your web browser):

image

But I could just have easily put in just ‘97’.

Now, there are two different things that can happen, and that depends on whether you are an administrator of the group, or a member. As an administrator, the tournament is automatically approved, and will show up as a tournament on the group page:

image

As a member, your tournament will be added to a ‘pending’ queue that only the administrators can see (soon you will be able to see  your own submissions too!).

Administrators can then look at the details of the competition:

image

Where they can approve/deny the request, or send a message to the submitter to get more details:

image

Which is then saved with the request, so all administrators can see what has been asked, (and the suggester as well)

image

So the suggester can reply and get their tournament approved:

image

We’re happy with this so we approve the tournament and the view changes:

image

We can go Back to the group and see our tournament there.

Tournr Tips #5 – Facebook

Tournr is designed to help the Organisers and Competitors of competitions, and the primary way it achieves this is via Email, so – whenever an Organiser changes a competition (location, time etc) if the ‘Send an email with the changes’ check box is selected:

image

an email is sent to everyone who has registered with the competition (competitors added by the Organiser aren’t – I can’t guarantee the email address is correct).

There is another communication method as well, Facebook – you only see this if you have set up your account to use Facebook and this is how:

Link your account

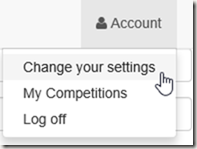
1. Login to Tournr and go to your ‘Change settings’ page:

image

2. Click on the ‘Facebook’ link:

image

3. Login to facebook, and you’ll get this Window:

image

This is the bare minimum Tournr can ask for.

4. If you press ‘OK’ to this, you’ll be presented with:

image

By default, Tournr would only post privately so only you can see it, you can choose to change how Tournr will post by selecting from the drop down on the side.

5. If you press OK to that, you’ll be taken back to Tournr, and should see:

image

Sending a Facebook Post

When you edit your Tournament now, you can now create a Facebook post:

image

Which when saved should put a post like this to your timeline:

image

Unlink my account

To unlink, simply press the ‘Unlink’ button on the ‘Change your settings’ page.

Tournr Tips #4 – Finalising

Fina-what?

Finalising is when you tell Tournr that your competition is finished. It is reversible, and you can ‘reopen’ your competition.

What happens?

Tournr will mark your competition as ‘finished’ and send an email out to all the registered members containing the results.

How do I finalise?

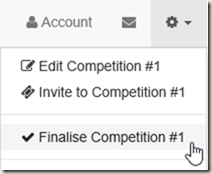
1. Log in to your competition and select the ‘cog’ at the top:

image

2. This will do one of two things, if you’ve already entered all your results, you’ll see:
image

If you’ve not put in all the results you’ll see:
image

then you’ll be taken to the ‘Are you sure’ screen.

3. Once you’ve finalised, you get taken to your competition page, with a ‘finished’ sub headline:

image

4. On your competitions page:

image

Your competition will now appear in your ‘Finished’ section – as an organiser you’ll see it in the ‘Organising’ section, competitors will see it in the ‘Finished/Competing’ section.

image

Tournr Tips #3 – Results

Tournr doesn’t just allow you to record entrants, but record their scores as well.

Adding Results

So, your competition has run and you’ve got results to enter

1. Go to the class you want to add the results for

2. Click on the ‘add results’ button:

image

3. You then get the ‘Add results’ page:

image

4. Fill it in as per your results:

image

Yes, you can use the same number for multiple people, as happens in some competitions.

5. You have the option of publishing now, if you check the ‘publish the results’ box:

image

the results will appear on your competition’s page. If you don’t then the results are saved, but they won’t be visible on your page – you can then go back to the ‘Set Results’ page and change the publish status later.

image

6. Saving takes you back to the main page, which (if you did publish the results) will look like:

image

New Feature – Private Competitions & Inviting

Tournr is proud to add a new feature:

Private Competitions

There are a few reasons why you might want private competitions, firstly you might want to play around with a competition (or the site!) but not have your efforts viewable to everyone, or you might just want to have a competition with your friends.

How to set the privacy

First off, you need to create a competition (or indeed edit an existing one), you’ll notice the checkbox under the competition name:

image

Simply, if checked – then it’ll be private, if left blank then it’ll be public.  It’s the same if you’re editing an existing tournament:

image

Obviously, unchecking the box will make your tournament public.

What does it mean?

Your tournament will not be searchable, or get-to-able by anyone you personally haven’t invited. When you look at your competition it will say ‘private’ next to the name:

image

On the home page, you will see a padlock next to your private competitions:

image

If someone goes to your competition, and they are not allowed in (or aren’t logged in) they will see this page:

image

Inviting

A competition of 1 does not make for a lot of fun (although you do win all the time, so there is an upside!) – so you’ll want to invite people.

You invite via the ‘cog’ menu in the top right hand corner:

image

You fill in the form that pops up:

image

NB. It’s a semi-colon (;) delimited list of email addresses.

Press the ‘Send Invites’ button and away you go. The invitees will get an email asking them to come along and see the competition. Invitees do have to have an account on the site to see your competition, and the invite code they get is a one-time-use code, once they’ve used it no-one else can use it.

When you have invited people you can see who you’ve invited on your competition page (only organisers can see this):

image

The numbers mean I have sent 1 invite, and I’ve had 0 people accept.

I have two choices with the invite, the ‘resend’ button will resend the original invite, the ‘delete’ button will delete the invitation – so if the invitee does click on the link in the email – they still won’t be able to see the competition (useful if you put the wrong email address in by accident).

If someone accepts an invitation to a private competition all it means is that they can see the competition, they are not automatically registered to compete or anything, so you can quite easily invite people just to spectate the competition, or maybe just to view it to give you feedback before you make it public.

You can see who has accepted via the ‘Invites’ section of the Tournament Page:

image

Invitation Side Effect (or plus point)

One of the nice things about the invitation system is that it will also work for non-private competitions, so you can invite people to see your competition via the ‘cog’ menu in exactly the same way as above.

The main difference is that users will be sent just a link to your competition as no invite code is needed.

What if I want to go Private from Public?

Good question – Anyone who is registered to compete will still be able to see the competition, as will any organisers. People who have just looked at the competition in the past will not be able to see the competition anymore without and invite.

Questions?

As always – just ask either email or comment and I will be happy to help!

Tournr Tips #1 – Non-registered competitors

Not everyone wants to register on a new website, some don’t have access to the internet, some just don’t want a new username and password to remember, as an organiser using Tournr this might cause you some problems. Tournr wouldn’t be very useful to you if you can’t add non-registered competitors, but as luck would have it, you can!

To add a competitor:

1. Login and go to your competition:

image

2. Scroll to the ‘Classes’ part of the competition

image

3. On the class you want to add a competitor to, press the ‘+’ button:

image

4. Fill in all the details you want on the form that appears, (the ‘Name’ is all that is needed):

image

5. Press ‘Add competitor’ and you’ll add a new competitor:

image

Thanks for using Tournr!